Contents
- 1 Typical Steps in Hardwood Floor Refinishing
- 2 Different Hardwood Floor Refinishing Options Available
- 3 Finish Options
- 3.1 Understanding Imperfections Before and After a Hardwood Floor Refinish
- 3.2 Maintaining Refinished Hardwood Floors after a Hardwood Floor Refinish
- 3.3 Can Engineered Wood Flooring and Prefinished Wood Flooring be Refinished?
- 3.4 Why Hire a Profession Hardwood Flooring Contractor for a Refinish
- 3.5 Final Thoughts From the Author
- 4 Hardwood Floor Refinishing FAQ’s and Videos
- 4.0.1 Is there a lot of dust when refinshing hardwood floors?
- 4.0.2 Can I change the color of my hardwood floors during refinishing?
- 4.0.3 Do I need to move furniture and vacate the area during refinishing?
- 4.0.4 How long does hardwood floor refinishing take?
- 4.0.5 What are the steps involved in hardwood floor refinishing?
- 4.0.6 Can I refinish my hardwood floors myself?
- 4.0.7 When should I consider refinishing my hardwood floors?
- 4.0.8 : What is hardwood floor refinishing?
This information is provided solely for informational purposes, and we strongly recommend consulting a professional flooring contractor for any hardwood floor installation, refinishing, or repair projects. Experienced contractors possess the expertise and skills necessary to ensure the best results, safety, and longevity of your hardwood flooring investment.
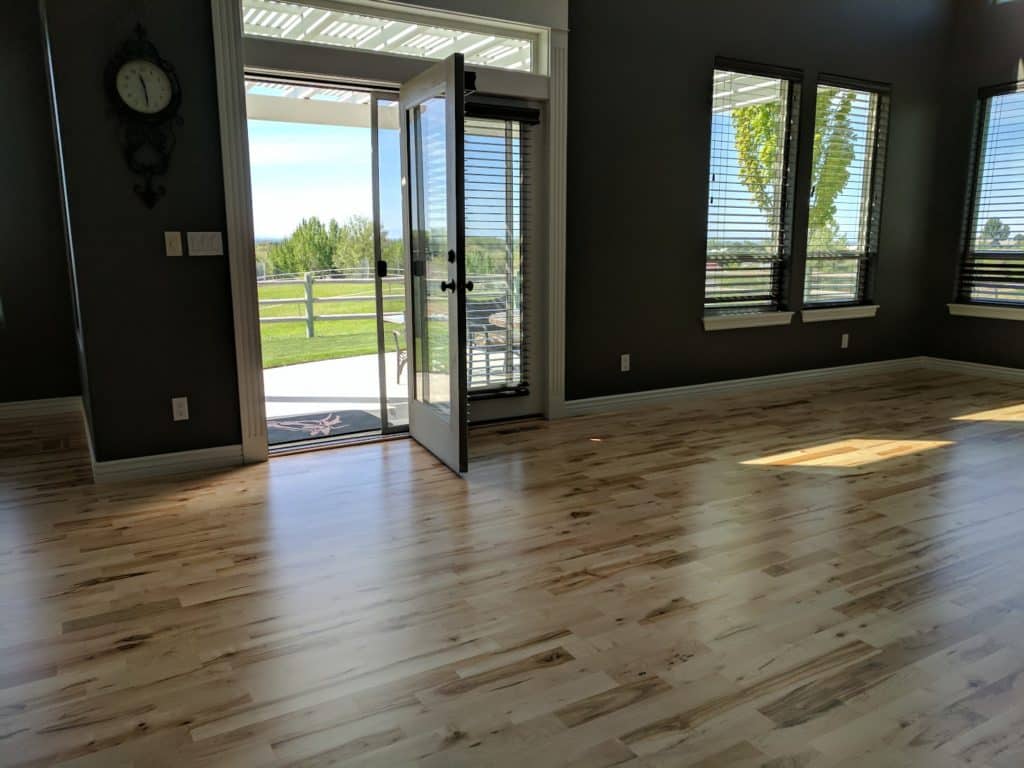
Hardwood floor refinishing is a meticulous process that revitalizes wooden floors. It involves the removal of the top layer, revealing the fresh, raw wood beneath, followed by the application of a new finish. Typically, refinishing adheres to the NWFA standards for hardwood floor restoration. This process serves as an excellent way to restore the allure of old or worn hardwood floors or to change their color and finish to better complement the room’s decor. In this article, we will delve deeper into the hardwood floor refinishing process, exploring the steps involved, the tools and materials required, and essential tips and considerations.
Contents
- 1 Typical Steps in Hardwood Floor Refinishing
- 2 Different Hardwood Floor Refinishing Options Available
- 3 Finish Options
- 3.1 Understanding Imperfections Before and After a Hardwood Floor Refinish
- 3.2 Maintaining Refinished Hardwood Floors after a Hardwood Floor Refinish
- 3.3 Can Engineered Wood Flooring and Prefinished Wood Flooring be Refinished?
- 3.4 Why Hire a Profession Hardwood Flooring Contractor for a Refinish
- 3.5 Final Thoughts From the Author
- 4 Hardwood Floor Refinishing FAQ’s and Videos
- 4.0.1 Is there a lot of dust when refinshing hardwood floors?
- 4.0.2 Can I change the color of my hardwood floors during refinishing?
- 4.0.3 Do I need to move furniture and vacate the area during refinishing?
- 4.0.4 How long does hardwood floor refinishing take?
- 4.0.5 What are the steps involved in hardwood floor refinishing?
- 4.0.6 Can I refinish my hardwood floors myself?
- 4.0.7 When should I consider refinishing my hardwood floors?
- 4.0.8 : What is hardwood floor refinishing?
- 5 Related Post
Typical Steps in Hardwood Floor Refinishing
Step 1: Clearing the Floor The initial and crucial step in achieving a flawless hardwood floor refinish is to ensure the complete removal of debris, furniture, and decorations from the floor. A cleaner surface yields a better result, as every speck of dust, dirt, or debris can compromise the smoothness of the floor or interfere with the finishing. Although the flooring installer or contractor will conduct a thorough cleaning, it is advisable to prepare the floor by cleaning it before their arrival.
Step 2: Belt Sanding and Drum Sanding Belt sanding a hardwood floor entails utilizing a drum sander, a robust machine equipped with a rotating sanding drum powered by an electric motor. The process involves attaching a sandpaper belt to the drum and gently lowering the sander onto the floor. Typically a hardwood flooring contractor must select the girts he will be using based on how damaged your floor is. The lower the grit he/she uses for the initial pass is dictated by how much wood needs to come off the floor.
Step 3: Edging Hardwood edging focuses on sanding areas around the edges of the floor and in corners where the drum sander cannot reach. Typically performed after sanding the main floor section, the objective of edging is to create a seamless transition between the main floor and its edges and corners while eliminating imperfections. Just like belt sanding the floor in the previous step (usually done at the same time by the 2nd crew member) the initial cut is determined by the damage the floor has or imperfections the flooring contractor must get out of the floor. By over sanding the contractor takes extra wood off the floor is not needed but not sanding enough means the floor will not be the best it can be.
After sanding, vacuum and dust the floor to remove debris and fill any holes or cracks with wood filler before sanding them smooth.
Step 4: Buffing and Planetary Sanding Buffing, a post-sanding step, employs a floor buffer, also known as a floor polisher or maintainer, to polish and enhance the hardwood floor’s shine. This process eliminates any overlooked scratches or imperfections from the sanding stage, ensuring a smooth finish. Buffing typically utilizes 80 to 120 grit sandpaper or a screen. It represents the final step in a hardwood floor refinishing process.
Step 5: Vacuuming Vacuuming between each step is advisable to maintain a debris-free surface and prepare the floor for subsequent treatments. Regardless of the chosen refinishing steps, vacuuming before the next procedure is recommended for a professional finish.
Different Hardwood Floor Refinishing Options Available
- Staining: Staining hardwood floors is a popular technique used to enhance the color and appearance of wood surfaces and can be done when hardwood floor refinishing. It involves applying a specially formulated wood stain to the bare wood, allowing it to penetrate and soak into the grain. This process can transform the natural wood color, creating a wide range of shades and tones to match various interior design styles.
- Textures: Hardwood flooring offers a variety of textures that can greatly influence the overall look and feel of a room. Smooth, glossy finishes provide a sleek and modern appearance, making spaces feel more open and contemporary. On the other hand, hand-scraped or distressed textures offer a rustic and time-worn charm, adding character and warmth to a room, while wire-brushed textures provide a subtle, weathered look that can complement both traditional and modern decor styles. The choice of texture in hardwood flooring allows homeowners to customize their floors to match their design preferences and the ambiance they wish to create.
- Sheen: The sheen of a hardwood floor refers to the level of shine or gloss present on the surface of the wood. There are various sheen options available, ranging from high-gloss, which offers a shiny and reflective finish, to semi-gloss, which provides a moderate level of shine, and satin or matte, which have low to no shine and offer a more natural, subdued appearance. Homeowners often choose the sheen of their hardwood floors based on their aesthetic preferences and practical considerations, with higher sheens being more reflective but potentially showing scratches and imperfections more readily, while lower sheens provide a more forgiving and rustic look. It is important to tell your contractor which sheen you want prior to a hardwood floor refinishing project.
Additions Can Be Done in a Hardwood Floor Refinish
- Lace-in: Lace-in, in the context of hardwood flooring, refers to a technique used to seamlessly integrate new hardwood planks into an existing floor. This method involves carefully removing damaged or worn sections of the old floor and replacing them with new wood planks that are intricately woven or “laced” into the existing pattern. Lace-in repairs are typically performed by skilled craftsmen to ensure that the new planks blend seamlessly with the original floor, resulting in a nearly invisible repair that restores the floor’s overall appearance and integrity. This process is done prior to hardwood floor refinishing is done.
- Water Damage Repair: Water damage repair during a hardwood floor refinishing project involves addressing any moisture-related issues or damages that may have affected the wood. This can include replacing warped or swollen boards, addressing water stains, and ensuring the wood is thoroughly dried to prevent future problems. It’s essential to tackle water damage before refinishing to achieve a smooth and flawless finish that enhances the floor’s beauty and longevity.
- Damaged Boards: Board repair is a crucial aspect of a hardwood floor refinishing project. It involves addressing any damaged or deteriorated individual boards within the flooring. Repairing boards may include replacing sections that are severely warped, cracked, or stained, ensuring that the surface is even and free of imperfections before proceeding with the refinishing process. Proper board repair not only enhances the final result but also helps preserve the structural integrity and overall aesthetics of the hardwood floor.
Finish Options
- Water-Based Floor Finish: Water-based finishes, characterized by their primary water solvent, offer environmental friendliness and lower toxicity compared to oil-based counterparts. They are applied similarly but dry faster with fewer volatile organic compounds (VOCs), making them suitable for those sensitive to chemical odors or aiming to reduce their environmental impact.
- Oil-Based Finish: Oil-based finishes, based on petroleum solvents, penetrate wood deeply, providing durability and longevity. However, they take longer to dry, emit strong odors due to higher VOC levels, and may yellow over time, which may not suit lighter wood or those desiring a natural appearance.
- Penetrating Finish: Penetrating oil finish, exemplified by Rubio Monocoat and Miricle oil, penetrates wood pores, offering lasting protection and a matte finish. It differs from traditional surface finishes as it bonds within the wood, providing a durable shield against wear and tear. Rubio Monocoat, made from natural, plant-based oils and available in various colors, offers easy application, fast drying, and low VOC content.
Understanding Imperfections Before and After a Hardwood Floor Refinish
Hardwood floors are naturally imperfect due to the variations inherent in wood, such as color and grain patterns. Imperfections like knots, cracks, and blemishes contribute to wood’s unique charm and character, making it a desirable flooring choice. Additionally, wear and tear over time may result in scratches, dents, or damage, which can be mitigated through hardwood floor refinishing.
Maintaining Refinished Hardwood Floors after a Hardwood Floor Refinish
To preserve refinished hardwood floors, maintain cleanliness, and protect them from damage. Follow these maintenance tips:
- Regularly clean the floor using a vacuum, sweep, or damp mop, avoiding excessive water.
- Place mats and rugs in high-traffic areas and entrances to prevent dirt accumulation and wear.
- Quickly dry any spills or standing water to avoid damage.
- Use furniture pads or felt pads on furniture legs to prevent scratches and dents.
Can Engineered Wood Flooring and Prefinished Wood Flooring be Refinished?
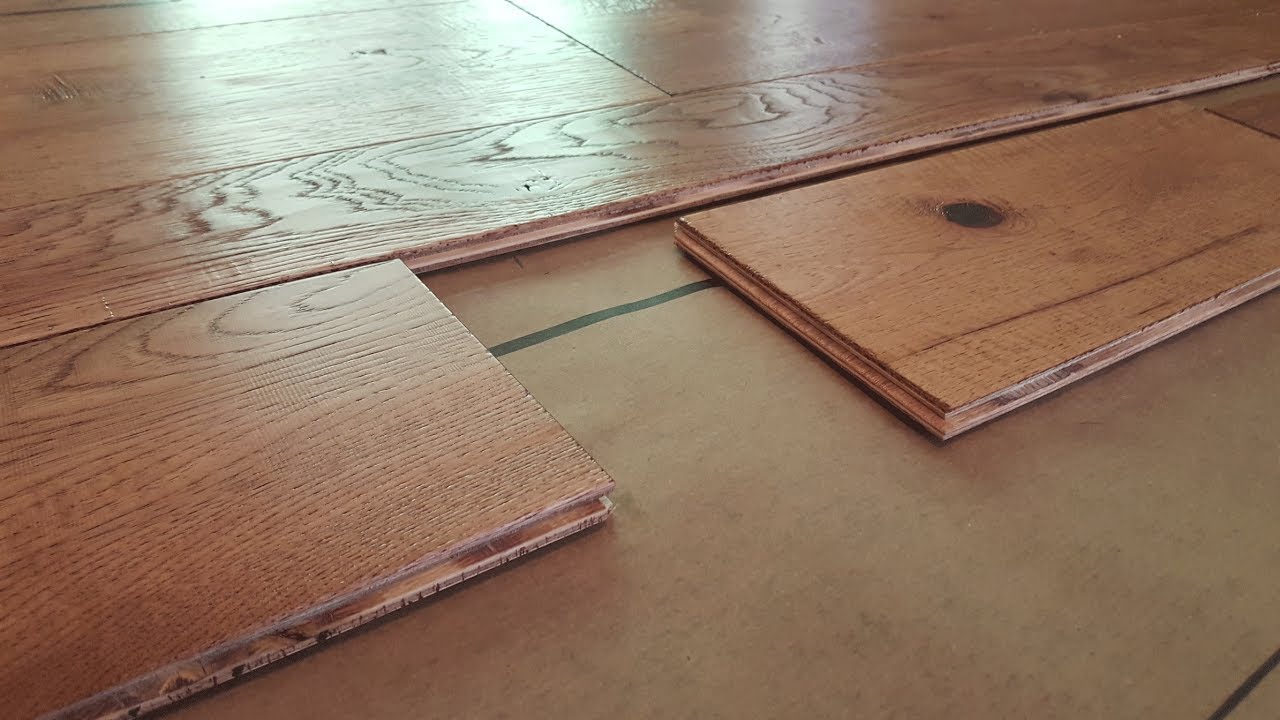
Engineered hardwood flooring: Refinishing an engineered prefinished floor can be challenging and is often not recommended because of the limited thickness of the hardwood wear layer. Engineered hardwood floors typically consist of a thin veneer of real hardwood layered on top of a plywood or composite core. The thin veneer means that there is minimal material available for sanding and refinishing, and excessive sanding can easily wear through the wear layer, compromising the floor’s integrity. Additionally, the prefinished surface often includes a factory-applied finish that can be difficult to strip and refinish effectively. While some lightly worn engineered hardwood floors may be refinished, it’s generally a risky and complex process that can lead to irreversible damage, making replacement or covering with a new layer of flooring a more practical solution in most cases.
Prefinished Solid Hardwood Flooring: Prefinished solid hardwood flooring shares similarities with solid unfinished flooring and offers the advantage of being refinishable. The wear layer typically measures around 6.5mm in thickness, making it a durable option for refinishing. While removing the baked-on finish may pose some challenges, it is entirely achievable with the right techniques and tools.
Why Hire a Profession Hardwood Flooring Contractor for a Refinish
Hiring a professional hardwood floor contractor for hardwood floor refinishing is unquestionably the wisest choice when considering a hardwood floor refinishing project. These skilled craftsmen bring a wealth of experience and expertise to the table, ensuring that your hardwood floors receive the meticulous care they deserve. One of the most compelling reasons to enlist the services of a professional is their ability to assess the condition of your floors accurately. They can identify hidden issues, such as structural damage, moisture concerns, or underlying problems, which may not be apparent to the untrained eye. By addressing these issues early on, professionals can prevent potential complications and costly repairs down the road.
Moreover, professional hardwood floor contractors possess access to high-quality tools, equipment, and refinishing materials that are typically not available to the average homeowner. This ensures that the refinishing process is executed with precision and efficiency, resulting in a flawless, long-lasting finish. Professionals also adhere to industry standards and best practices, guaranteeing that the refinishing project is conducted safely and in compliance with local regulations. Overall, entrusting your hardwood floor refinishing to a professional not only saves you time and effort but also guarantees a stunning, durable result that enhances the beauty and value of your home. If you are in Atlanta, Boise or Spokane you can view their respective pages about Hardwood Floor Refinishing as well to find a local contractor.
Final Thoughts From the Author
A hardwood floor refinish breathes new life into your floors by addressing imperfections and applying a fresh finish. While it won’t eliminate all natural variations or wear and tear, it significantly enhances the floor’s appearance. Embrace these refinishing options and maintain your hardwood floors for lasting beauty and value.
Hardwood Floor Refinishing FAQ’s and Videos
Dust can be an issue if the professional lacks the appropriate equipment. However, when equipped with the right tools, the dust generated during the refinishing process is comparable to what you might encounter on a typical day in a household. Modern vacuum systems are highly efficient and effectively capture dust. It’s worth noting that most professional hardwood floor sanders utilize specialized vacuums designed for this purpose, which are far more effective than standard household vacuums.
Yes, you can change the color of your hardwood floors by using a different stain during the refinishing process. This allows you to update the look of your floors to match your decor.
Yes, it’s essential to clear the area of furniture and vacate the premises during the refinishing process for safety and to allow the professionals to work efficiently.
The time it takes to refinish hardwood floors depends on factors like the size of the area, the condition of the floors, and the number of coats needed. On average, it can take 2-5 days, including drying times.
The typical steps in hardwood floor refinishing include sanding, staining (if desired), and applying a finish coat. Sanding removes the old finish and imperfections, staining adds color, and the finish coat provides protection and sheen.
While some homeowners with DIY skills may attempt hardwood floor refinishing, it is often best left to professionals. DIY refinishing can lead to uneven results, damage, or even costly mistakes.
You should consider refinishing your hardwood floors when they show signs of wear, such as deep scratches, dullness, or when the existing finish starts to wear off. Typically, this occurs every 7-10 years, but it depends on foot traffic and maintenance.
Hardwood floor refinishing is the process of sanding down the top layer of your hardwood floors to remove scratches, stains, and imperfections, followed by applying a new finish to restore their beauty and protect them.

