
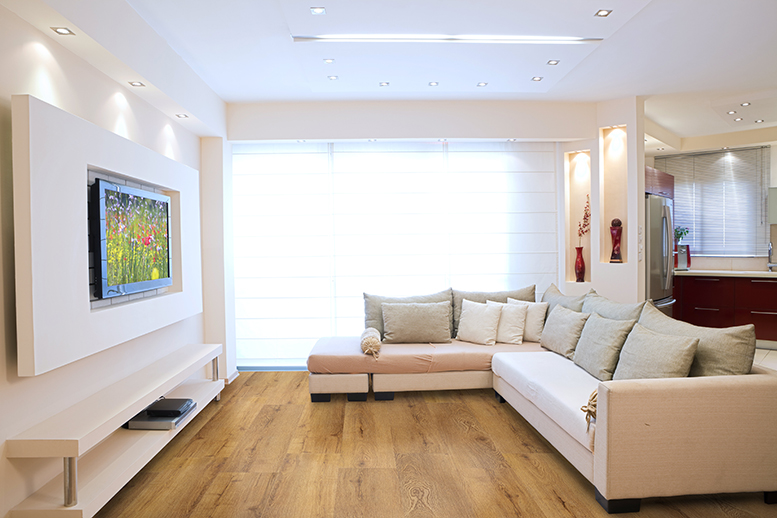
This article on Refinishing hardwood Floors: The Ultimate Guide is meant for general overview purposes. You will find that this article does not have the nitty, gritty your hardwood flooring professional does. This is meant to give you an overview of how the process works, what the general processes are, and how to maintain the floor after completion.
Hardwood floor refinishing is a process that involves sanding down the top layer of a wood floor to reveal the fresh, raw wood underneath, and then applying a new finish to protect and enhance the appearance of the floor – typically following the NWFA standards for hardwood floor refinishing. This process can be a great way to restore the beauty of an old or worn hardwood floor or to change the color or finish of a floor to better match the decor of a room. In this article, we’ll take a closer look at the process of hardwood floor refinishing, including the steps involved, the tools and materials needed, and some tips and considerations to keep in mind.
Moving Everything Off the Floor
The first and most critical step to a perfect hardwood floor refinish is to have the floor fully cleared of any debris, furniture, decorations etc. A cleaner floor will produce a better outcome of the floor as each particle of dust, dirt and debris can hinder a perfectly flat floor or debris in the finish. While the flooring installer or flooring contractor will certainly clean the floor, it is ideal to still clean the floor prior to their show-up time.
Belt Sanding / Drum Sanding
Belt sanding a hardwood floor involves using a drum sander, which is a large, heavy machine with a rotating sanding drum that is powered by an electric motor. To use the drum sander, you’ll need to attach a sandpaper belt to the drum, and then lower the sander onto the floor. You’ll need to be careful to keep the sander moving in a straight line and to keep the pressure consistent to avoid creating any dips or unevenness in the floor.
Here are the steps for belt sanding a hardwood floor:
- Choose the right sandpaper: The type of sandpaper you use will depend on the condition of the floor and the desired level of finish. For example, if the floor is in good condition and you’re just looking to refresh the finish, you may only need to use medium grit sandpaper. However, if the floor is heavily worn or damaged, you may need to start with a coarser grit sandpaper to remove more material.
- Start the sander: Turn on the sander and lower it onto the floor. Begin sanding the floor in a straight line, starting at one end of the room and working your way to the other end.
- Keep the sander moving: Keep the sander moving in a straight line and maintain consistent pressure to avoid creating dips or unevenness in the floor. There are chances the sander will not go straight with the boards in certain areas of the floor or certain damage has been done.
- After each pass, a higher grit will be used till the final grit is met. Typically there are 2-3 passes with a big machine or belt sander.
Edging
Hardwood edging refers to the process of sanding the areas around the edges of a hardwood floor and in corners where a drum sander can’t reach. This step is typically done after sanding the main portion of the floor with a belt/drum sander. The goal of hardwood edging is to create a smooth, even transition between the main portion of the floor and the edges and corners, and to remove any imperfections or damage in these areas.
Edging a hardwood floor with an edger sander involves using a smaller, hand-held sander to sand the areas around the edges of the room and in corners where a drum sander can’t reach. This step is typically done after sanding the main portion of the floor with a drum sander. Here are the steps for edging a hardwood floor with an edger sander:
- Turn on the edger sander: Turn on the edger sander and lower it onto the floor. Begin sanding the floor in a straight line, starting at one end of the room and working your way to the other end.
- Keep the edger sander moving: Keep the edger sander moving in a straight line and maintain consistent pressure to avoid creating dips or unevenness in the floor. You’ll need to periodically empty the dust bag on the sander and replace the sandpaper as needed.
- Sand the corners: Use the edger sander to sand the corners of the room, being careful to keep the sander moving in a straight line and to maintain consistent pressure.
- Vacuum and dust the floor: After sanding, vacuum and dust the floor to remove any remaining debris. You’ll also want to fill any holes or cracks in the floor with wood filler and sand them smooth.
Buffing / Planetary Sanding
Hardwood floor buffing is a process that involves using a floor buffer, also known as a floor polisher or floor maintainer, to polish and shine a hardwood floor. This step is typically done after the floor has been sanded and refinished, and is designed to remove any scratches or imperfections that may have been missed during the sanding process and to create a smooth floor. BUffing is a slower process that gets all the previous sanding marks out and is generally done with a 80 grit to 120 grit sandpaper or screen. Buffing is the last step generally in a hardwood floor refinishing process.
Vacuuming
Vacuuming between each step is a good idea as it gets the floor prepared for the next step without any debris on the floor. It is also recommended to vacuum prior to the next steps below no matter which steps you choose to have done to your floor by your hardwood flooring professional.
Different Refinishing Options Available in Boise, Idaho
Staining
Staining a hardwood floor refers to the process of applying a colored pigment to the surface of the wood to change its appearance. Staining a hardwood floor is a popular way to give an old or worn floor a fresh, new look, or to change the color of a floor to match the decor of a room.
After the stain has dried completely, you’ll need to apply a clear finish, such as polyurethane, to protect the floor and enhance the shine. You’ll need to follow the manufacturer’s instructions for the finish you’re using, and apply multiple coats as needed.
Overall, staining a hardwood floor is a great way to refresh the appearance of an old or worn floor, or to change the color of a floor to match the decor of a room. While the process can be time-consuming and requires some specialized tools and materials, the end result is a beautiful, durable floor that will add value and appeal to your home.
Finish Options
Water-Based Floor Finish
A water-based floor finish is a type of clear finish that is used to protect and enhance the appearance of a wood floor. Water-based finishes are made with water as the primary solvent, rather than petroleum-based solvents like oil-based finishes. As a result, water-based finishes are generally considered to be more environmentally friendly and less toxic than oil-based finishes.
Water-based finishes are applied to the surface of a wood floor in the same way as oil-based finishes, using a paint roller or brush to apply a thin, even coat. Water-based finishes dry faster and have lower levels of volatile organic compounds (VOCs) than oil-based finishes, making them a popular choice for individuals who are sensitive to chemical odors or who are looking to reduce their impact on the environment.
Water-based finishes are also known for their clarity and lack of yellowing, which makes them a good choice for lighter-colored woods or for individuals who want to maintain the natural appearance of their wood floor. They are also generally easier to clean up and remove than oil-based finishes.
Overall, water-based floor finishes are a popular choice for individuals who are looking for a clear finish that is environmentally friendly, dries quickly, and does not yellow over time. They are a durable and effective way to protect and enhance the appearance of a wood floor.
Oil-Based Finish – Click here to see them
An oil-based floor finish is a type of clear finish that is used to protect and enhance the appearance of a wood floor. Oil-based finishes are made with petroleum-based solvents, which allow them to penetrate deeper into the wood than water-based finishes. As a result, oil-based finishes are generally considered to be more durable and longer-lasting than water-based finishes.
Oil-based finishes are applied to the surface of a wood floor in the same way as water-based finishes, using a paint roller or brush to apply a thin, even coat. Oil-based finishes take longer to dry than water-based finishes and have higher levels of volatile organic compounds (VOCs), which can produce strong odors and may be harmful to indoor air quality. They also have a tendency to yellow over time, which may not be desirable for lighter-colored woods or for individuals who want to maintain the natural appearance of their wood floor.
Despite these drawbacks, oil-based finishes are still a popular choice for many individuals due to their durability and ability to provide long-lasting protection for wood floors. They are also generally easier to apply and easier to touch up than water-based finishes, making them a good choice for individuals who want a low-maintenance finish.
Overall, oil-based floor finishes are a durable and effective way to protect and enhance the appearance of a wood floor. They are a popular choice for individuals who are looking for a clear finish that is long-lasting and easy to maintain.
Penetrating Finish
Floor penetrating oil finish, such as Rubio Mnocoat & Miricle oil, is a type of wood finish that is designed to penetrate deep into the pores of a wood floor, providing long-lasting protection and a natural, matte finish. Unlike traditional wood finishes, which sit on top of the wood surface, floor-penetrating oil is absorbed into the wood, forming a strong, durable bond that helps to protect the wood from wear and tear.
Rubio Monocoat is a popular brand of floor-penetrating oil that is made with natural, plant-based oils and is available in a wide range of colors. It is applied to a wood floor using a roller or brush and only requires one coat for full coverage. Rubio Monocoat is known for its ease of application, fast drying time, and low VOC content, making it a popular choice for individuals who are looking for an environmentally friendly wood finish.
Floor penetrating oil is a popular choice for individuals who want to maintain the natural appearance of their wood floor and who are looking for a durable, low-maintenance finish. It is also a good choice for individuals who want to add color to their wood floor, as it is available in a wide range of colors. Overall, floor penetrating oil is a versatile and effective way to protect and enhance the appearance of a wood floor.
Will My Hardwood Floor Refinish in Boise be Perfect?
Hardwood floors are not perfect, unlike furniture, because they are made from natural wood, which is prone to variations in color, grain pattern, and other characteristics. These variations are a natural part of wood and are what gives wood its unique character and beauty.
In addition to natural variations, hardwood floors may also have imperfections such as knots, cracks, and other blemishes that are inherent to the wood. These imperfections are generally considered to be part of the natural charm and character of a wood floor and are not considered to be defects.
Another reason why hardwood floors may not be perfect is due to wear and tear. Over time, a hardwood floor may become scratched, dented, or otherwise damaged due to foot traffic, furniture, and other factors. These imperfections can be repaired or concealed through sanding and refinishing, but they are a normal part of the aging process of a wood floor.
Overall, while hardwood floors may not be perfect, they are a beautiful and durable flooring option that adds value and appeal to a home. The natural variations and imperfections in wood are what give it its unique character and beauty, and are a key part of what makes hardwood floors so desirable.
How to Maintain Hardwood Floors After a Hardwood Floor Refinish in Boise
Maintaining hardwood floors after refinishing them involves taking steps to keep the floor clean and protected from damage. Here are some tips for maintaining a hardwood floor after refinishing:
- Keep the floor clean: Regularly sweep or vacuum the floor to remove dirt, dust, and debris. Avoid using a vacuum with a beater bar, as it can scratch the surface of the floor. You can also use a damp mop or cloth to clean the floor, but be sure to wring out the mop or cloth well to avoid leaving standing water on the floor.
- Use protective mats and rugs: Place mats and rugs at entrances and in high-traffic areas to help protect the floor from dirt and wear. Choose mats and rugs that have a non-slip backing to help prevent slips and falls.
- Protect the floor from water: Water can damage a hardwood floor, so be sure to dry any spills or standing water on the floor as soon as possible. Avoid using excess water when cleaning the floor, and never allow standing water to sit on the floor for an extended period of time.
- Protect the floor from furniture: Use furniture pads or felt pads on the legs of furniture to help protect the floor from scratches and dents. Avoid dragging furniture across the floor, as this can
A Hardwood Floor Refinish is a Great Way to Make Your Floor Look 99% New Again!
A wood floor refinish can make your floor look like new by removing scratches, dents, and other imperfections and by applying a new finish to the surface of the floor. The refinishing process involves sanding the floor to remove the existing finish and any imperfections, and then applying a new finish, such as polyurethane, to protect the floor and enhance its appearance.
After a wood floor has been refinished, it will generally look smoother, cleaner, and more even in color than it did before. The new finish will also help to protect the floor from wear and tear and will give it a fresh, polished appearance.
It’s important to note that a wood floor refinish will not completely eliminate all imperfections or blemishes in the floor. Natural variations in the wood, such as knots and grain patterns, will still be present, and the floor may still show signs of wear and tear over time. However, a wood floor refinish can significantly improve the appearance of an old or worn floor and can make it look like new again.
FAQ’s & Videos about Refinishing Hardwood Floors in Boise
Dust can be an issue if the professional lacks the appropriate equipment. However, when equipped with the right tools, the dust generated during the refinishing process is comparable to what you might encounter on a typical day in a household. Modern vacuum systems are highly efficient and effectively capture dust. It’s worth noting that most professional hardwood floor sanders utilize specialized vacuums designed for this purpose, which are far more effective than standard household vacuums.
Yes, you can change the color of your hardwood floors by using a different stain during the refinishing process. This allows you to update the look of your floors to match your decor.
Yes, it’s essential to clear the area of furniture and vacate the premises during the refinishing process for safety and to allow the professionals to work efficiently.
The time it takes to refinish hardwood floors depends on factors like the size of the area, the condition of the floors, and the number of coats needed. On average, it can take 2-5 days, including drying times.
The typical steps in hardwood floor refinishing include sanding, staining (if desired), and applying a finish coat. Sanding removes the old finish and imperfections, staining adds color, and the finish coat provides protection and sheen.
While some homeowners with DIY skills may attempt hardwood floor refinishing, it is often best left to professionals. DIY refinishing can lead to uneven results, damage, or even costly mistakes.
You should consider refinishing your hardwood floors when they show signs of wear, such as deep scratches, dullness, or when the existing finish starts to wear off. Typically, this occurs every 7-10 years, but it depends on foot traffic and maintenance.
Hardwood floor refinishing is the process of sanding down the top layer of your hardwood floors to remove scratches, stains, and imperfections, followed by applying a new finish to restore their beauty and protect them.
Author Profile
- I have worked in hardwood flooring for the last 8 years. Use to run a company of residential crews as well as a company with gym flooring. If you need floor installation or refinishing help, I should have an answer or at least get you in the right direction.


