
Floor refinishing success depends on proper sandpaper progression and matching sealers to your specific needs. Start with coarse grit (24-40) to strip old finishes, progress through medium (60-80) for smoothing, and finish with fine grit (100-120) before sealing. Skipping steps creates visible scratches that sealers cannot hide. Water-based polyurethane provides quick-drying clear finishes while oil-based formulas offer durability with amber tones. Penetrating sealers work best for moisture-prone areas. Always vacuum thoroughly between grits and test sealers on inconspicuous spots first for optimal results.
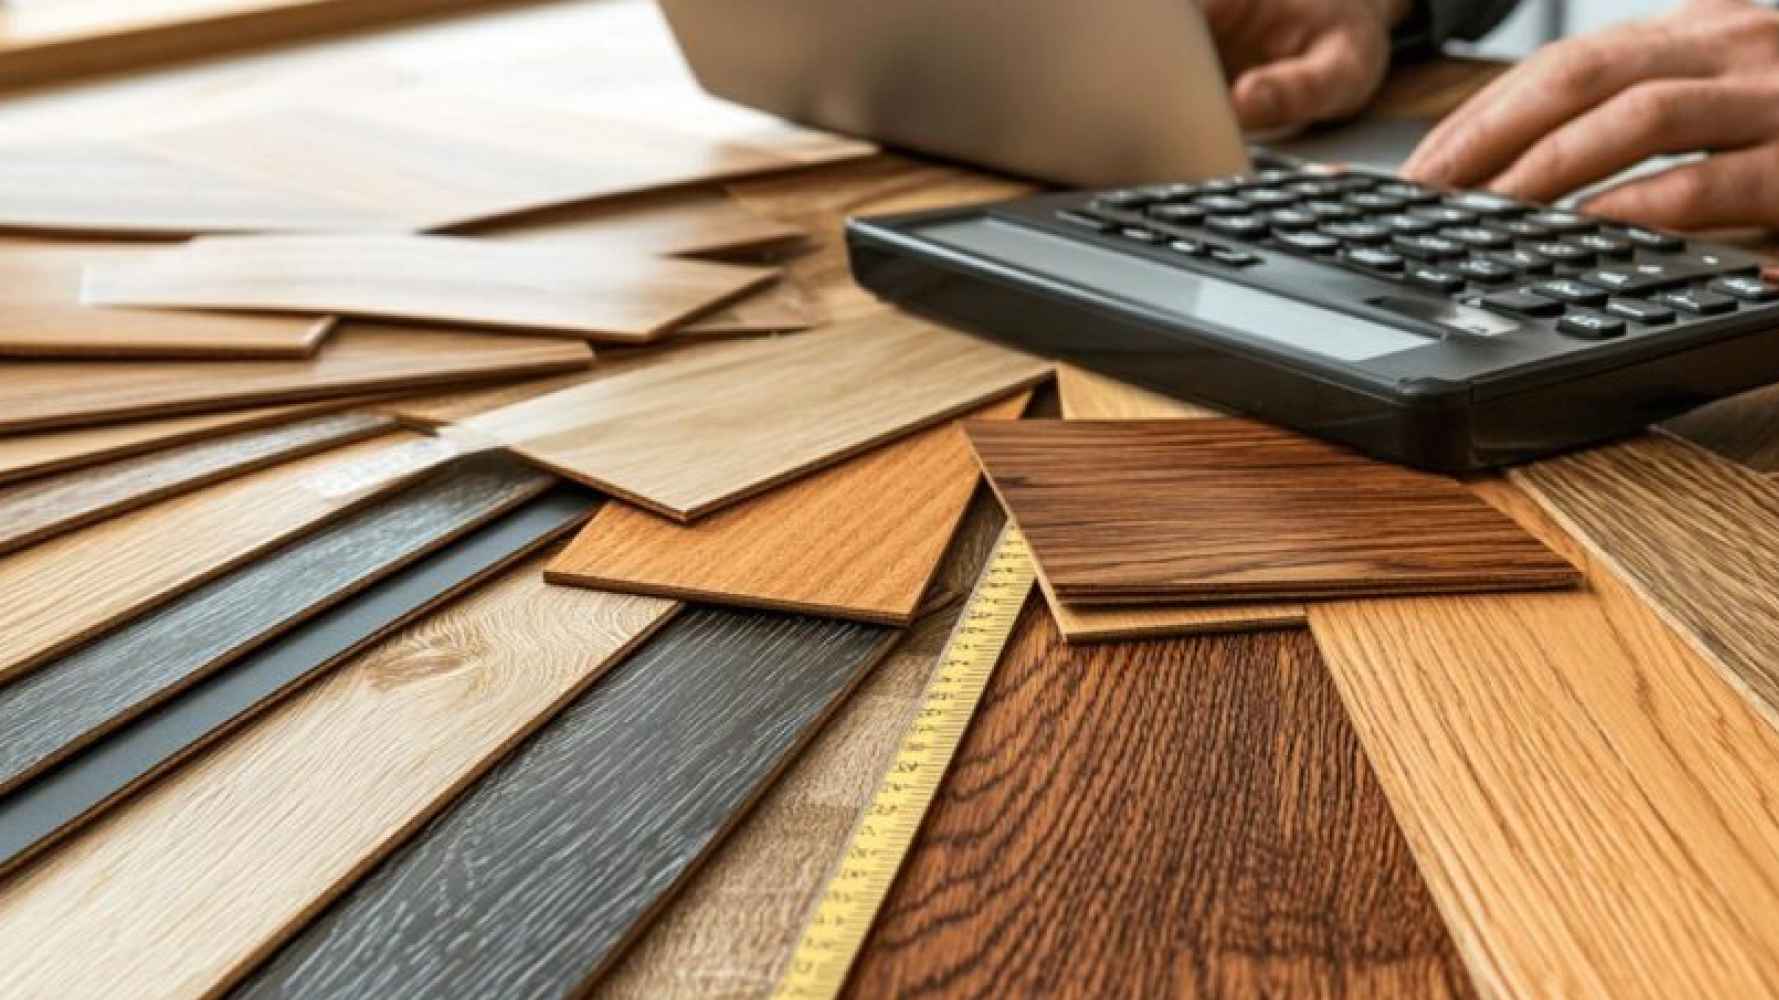
Refinishing floors transforms tired, scratched surfaces into showroom-quality beauty. But walk into any hardware store and you’ll face walls of sandpaper options and shelves packed with different sealers. Pick wrong and you’ll spend hours fixing mistakes or worse, damage your floors permanently. The right floor refinishing supplies make the difference between amateur results and professional quality. Understanding grit sequences and sealer chemistry isn’t complicated once you know the basics. Get these choices right and your floors will look incredible for years.
Browse complete sandpaper collections and premium sealers at Rustic Wood Floor Supply, where every product comes with expert application guidance.
Explore Floor Refinishing Supplies: (678) 691-0533
What Is Sandpaper Grit and Why Does It Matter?
Sandpaper grit refers to the number of abrasive particles per square inch. Higher numbers mean finer particles that create smoother surfaces. Lower numbers (24-40) feature large, aggressive particles that remove material quickly. Higher numbers (150-220) contain tiny particles that polish rather than cut. Understanding this numbering system is essential for successful floor refinishing.
The Inverse Numbering System
Forty individual mineral fragments occupy each square inch of 40-grit paper. One hundred twenty-grit packs three times more particles into the same space. Fewer crystals mean a larger size and aggressive cutting. Abundant microscopic grains deliver a gentle polishing action.
Material Removal Versus Surface Refinement
Heavy grits excavate deep into wood fiber, stripping protective coatings and flattening irregularities. Delicate grits erase imperfections from prior sanding without substantial material loss. Strategic progression transforms damaged wood into mirror-smooth surfaces ready for finishing.
Complete Sandpaper Grit Sequence
Professional refinishing follows a specific progression that cannot be rushed or skipped. Each grit stage serves a distinct purpose in transforming rough, damaged wood into a perfectly smooth surface ready for finishing. Skipping steps or using the wrong grits creates problems that compound as you work, often requiring you to start over completely.
1. Starting with Coarse Grit (24-40)
Extreme abrasion initiates projects demanding substantial coating elimination or height normalization.
Optimal deployment scenarios:
- There are multiple old finish layers to remove
- Pet claw marks or deep scratches cut into the wood
- Furniture left permanent dents or compression marks
- Water stains penetrated the surface
- Floors in old homes still have original shellac finishes
Critical warning: Each sander pass consumes irreplaceable wood volume. Deploy these aggressive papers only when alternatives prove inadequate.
2. Moving to Medium Grit (60-80)
Intermediate abrasion connects violent material removal with aesthetic refinement. This pivotal phase eliminates coarse-grit trauma while addressing resistant finish pockets. Grain architecture starts emerging from beneath the destruction layers. Natural beauty begins revealing itself as deep scoring disappears. Material transitions from demolished substrate to recognizable hardwood.
Medium grit objectives:
- Eradicate brutal scratch patterns from heavy papers
- Target finish remnants surviving the initial assault
- Establish a smooth foundation for final preparation
- Unveil the inherent wood character beneath damage
Abbreviated execution here compromises all subsequent stages.
3. Finishing with Fine Grit (100-120)
Ultimate preparation determines whether protective layers showcase natural magnificence or amplify flaws.
Essential verification techniques:
- Bare palm examination detects thermal variations and texture inconsistencies
- Angled flashlight beams expose defects invisible under direct illumination
- Grain orientation shifts register as tactile variations
- Fingertip sensitivity perceives roughness, which visual inspection misses
Thorough completion proves mandatory. No protective coating can compensate for inadequate surface preparation.
4. Extra-Fine Grit (150-220) for Between Coats
Post-application abrasion addresses fiber elevation and particulate contamination. Whisper-contact distinguishes polishing from material removal. Eliminate surface anomalies without compromising underlying protection. The primary goal involves creating an adhesion tooth rather than thickness reduction.
Choosing Your Starting Grit
The condition of the floor refinishing supplies determines where you begin the sanding process. Starting too coarse wastes valuable wood thickness and creates unnecessary work removing deep scratches. Starting too fine means endless hours of sanding without making real progress on finish removal. Accurate assessment of your floor’s current state guides this critical first decision.
Match your floor condition to the perfect grit sequence. Our product range includes multiple grits for every situation.
Catastrophically Damaged Floors
Severe damage, accumulated coating archaeology, or dimensional instability mandate 24-36 grit deployment.
Diagnostic indicators include:
- Animal damage penetrates the fiber architecture
- Furniture creates permanent height depressions
- Amateur repair attempts produce surface plane variations
- Historic structures with a century-old finish accumulation
- Boards exhibiting cupping, crowning, or twist deformation
These circumstances demand maximum abrasive intensity for restoration.
Moderately Compromised Floors
Cosmetic degradation without structural penetration permits 40-50 grit initiation. Wear remains superficial rather than systemic. Protective coating integrity persists despite aesthetic decline. Surface marking hasn’t reached the underlying wood. Previous finishes have exhausted defensive properties without substrate damage.
Minimally Affected Floors
Preventive renewal rather than corrective restoration characterizes this category. Sixty to eighty grit eliminates fatigued topcoats while conserving maximum material. Proactive intervention before coating failure permits bypassing aggressive grinding. Structural soundness remains intact. Only surface protection requires replacement.
Professional Sanding Techniques
Proper technique matters as much as grit selection for achieving professional results. Even perfect sandpaper choices fail without correct application methods and attention to detail. These fundamental techniques separate amateur attempts from expert-quality floors. Mastering these basics ensures your effort translates into beautiful, long-lasting results worth showcasing.
Debris Elimination Between Phases
Residual particles from prior abrasion function as unauthorized cutting agents, generating random scoring that destroys orchestrated progression.
Systematic sanitation approach:
- HEPA filtration captures what standard vacuums recirculate
- Sequential cleaning with settling intervals
- Tack cloth sweeps eliminate microscopic contaminants
- Angular light verification confirms sanitation success
Each purification cycle maintains progression integrity.
Directional Orientation Discipline
Always sand with the grain, not across it. Cross-grain sanding tears wood fibers and leaves scratches that stay visible even after finishing.
Directional compliance rationale:
- Perpendicular motion ruptures cellular walls instead of cleanly cutting
- Cross-grain scoring becomes a permanent defect visible through coatings
- Remediation often necessitates reverting to coarser papers
- Proper alignment yields defect-free smoothness
Force Application Management
Equipment mass alone provides the necessary cutting action. Supplemental downward force generates depressions, irregular removal, and premature abrasive failure.
Optimal operation protocol:
- Machine weight delivers adequate material removal
- Operator steers rather than pushes
- Continuous movement prevents localized excavation
- Pausing generates dwell marks requiring correction
Understanding Floor Sealer Options
Choosing the right sealer protects your sanding investment and determines your floor’s final appearance. Different formulas offer distinct advantages depending on your specific situation, from moisture protection to drying time to visual aesthetics. Understanding sealer chemistry and performance characteristics helps you match products to your needs. The right choice ensures your hard work remains beautiful for years.
Water-Based Polyurethane
Contemporary acrylic-urethane chemistry delivers protection minus traditional solvent complications. Occupied dwellings benefit from rapid cure and odor absence. Homeowners prioritizing natural appearance without amber shift select these formulations.
Defining characteristics:
- Recoat intervals of two to four hours
- Negligible odor suitable for inhabited spaces
- Transparent clarity, maintaining natural coloration
- Aqueous cleanup eliminates hazardous disposal
- Minimal volatile organic compound emissions
Oil-Based Polyurethane
Alkyd-modified urethane embodies proven floor finishing chemistry. Commercial environments and period authenticity favor this established chemistry. Maximum protection justifies extended cure durations.
Signature attributes:
- Amber enrichment warming wood hues
- Robust film construction creates superior wear layers
- Overnight intervals between applications
- Pronounced vapor signature requiring ventilation
- Exceptional moisture and abrasion immunity
Penetrating Sealers
Absorption chemistry functions from within the cellular structure rather than the surface film.
Silane/Siloxane mechanism:
- Molecular infiltration into wood architecture
- Hydrophobic barriers repel moisture while permitting vapor exchange
- Invisible protection preserving natural tactile experience
- Below-grade moisture interdiction for basement installations
- Frequent reapplication compared to film-forming alternatives
Historic conservation maintains an authentic presentation with invisible protection. Ground-contact locations experiencing moisture intrusion require vapor-permeable barriers.
Acrylic and Epoxy Sealers
Specialized rapid-cure chemistry addresses unique performance demands.
Acrylic formulations deliver:
- Flash-cure enabling accelerated completion
- Color-stable non-yellowing performance
- Simplified repair methodology
- Economic accessibility
Epoxy systems provide:
- Industrial abrasion immunity
- Chemical resistance for automotive or laboratory settings
- Minor imperfection concealment through gap-filling
- Superior substrate bonding
Selection depends on environmental challenges and performance criteria.
Matching Sealers to Your Needs
Several factors determine your ideal sealer choice beyond just personal preference. Consider each element carefully before purchasing to avoid costly mistakes or disappointing results. Your floor material, traffic patterns, moisture exposure, and desired appearance all influence which sealer performs best. Taking time for this analysis ensures satisfaction with your finished floors.
Material Compatibility Assessment
Floor construction dictates acceptable sealer chemistry. Solid hardwood flooring accommodates any protective chemistry. Substantial wear layers tolerate multiple refinishing cycles with diverse coatings. Engineered assemblies require selective chemistry. Thin decorative veneers prohibit deep-penetrating formulas from reaching plywood cores. Aqueous topcoats protect without excessive absorption.
Exotic timber contains organic compounds affecting cure dynamics:
- Tropical species like Brazilian cherry demand compatibility verification
- Natural extractives may inhibit proper adhesion
- Cure duration extensions can occur unpredictably
- Sample validation on scrap material proves essential
Traffic Intensity Analysis
Movement patterns determine protective requirements. Coating durability must match actual usage.
Maximum-impact zones endure relentless foot traffic and equipment:
- Commercial pathways need oil-based formulations
- Institutional settings benefit from industrial acrylics
- High-stress areas demand maximum wear immunity
- Performance supersedes application convenience
Moderate-activity areas experience regular but less severe use. Residential spaces need balanced protection. Quality water-based systems deliver adequate defense with easier handling.
Minimal-movement locations see occasional activity with stationary elements. Sleeping quarters and workspaces prioritize aesthetics over industrial protection. Visual preferences guide selection over durability imperatives.
Moisture Exposure Evaluation
Environmental conditions dictate barrier chemistry requirements. Wet-environment installations face standing liquid and extreme humidity. Bathing and cooking areas need oil-modified polyurethanes or moisture-cure urethanes.
Subterranean applications combat ground moisture transmission:
- Penetrating formulas create subsurface barriers
- Vapor escape prevention stops coating separation
- Breathable protection permits moisture movement
- Surface films entrap moisture, causing delamination
Climate-regulated spaces without exceptional exposure accept any chemistry. Temperature and humidity consistency eliminate moisture as a selection criterion.
Visual Presentation Goals
Appearance preferences affect daily satisfaction with refinished surfaces. High-sheen presentations maximize light reflection and grain amplification. Spatial enlargement occurs, but imperfections become highlighted. Maintenance demands escalate proportionally with gloss level.
Mid-luster presentations harmonize subtle reflection with practicality:
- Gentle light diffusion flatters wood beautifully
- Daily wear forgiveness without perpetual vigilance
- Dominant residential preference
- Aesthetic appeal minus maintenance burden
Low-sheen presentations deliver understated natural elegance. Contemporary aesthetics increasingly embrace minimal-reflection options. Wear concealment excels, but dim environments may appear subdued.
Compare sealer options based on your floor material, traffic patterns, and moisture conditions. Rustic Wood Floor Supply helps you select the right protection for lasting results.
Choose Your Sealer:(678) 691-0533
Common Refinishing Mistakes
Learning from others’ errors saves time, money, and frustration during your refinishing project. These mistakes appear frequently, even among experienced DIYers who think they can skip fundamental steps. Understanding what goes wrong and why helps you avoid these pitfalls entirely. Prevention through knowledge beats correction through additional work every single time.
Progression Abandonment
Attempting leaps from 40 to 120 grit leaves permanent scratch archaeology visible through subsequent coatings. Each intermediate grade specifically eliminates prior damage patterns. A misguided economy in omitted steps generates compounding expenses. Thirty minutes saved creates hours correcting resulting defects. Economics never favors abbreviation. Systematic refinement invariably proves faster than damage remediation.
Sanitation Deficiency
Particulate matter between the coating and substrate functions as an anti-bonding agent.
Exhaustive purification strategy:
- Initial evacuation removes visible contamination
- Subsequent passes capture airborne particles post-settling
- Tack cloth patrol eliminates invisible residuals
- Regarding each particle as a prospective defect
Iterative sanitation cycles yield dividends in ultimate quality.
Hasty Coating Deployment
Surface tack-absence misleads regarding internal cure status. Subsurface layers persist in volatilizing solvents and cross-linking beyond apparent dryness. Atmospheric conditions dramatically alter cure velocities. Cold, humid weather exponentially extends solidification. Scheduling must accommodate reality rather than optimistic projections. Patience during the cure prevents permanent softness and bonding failure.
Ventilation Deficiency
Good ventilation is critical. Open windows, create cross-breeze airflow, or use fans to remove fumes. Poor ventilation slows curing and poses a health risk.
Adequate ventilation specifications:
- Cross-flow with atmospheric exchange
- Opposing apertures establish circulation patterns
- Mechanical extraction accelerates air turnover
- Respiratory safeguards during deployment
- Total exclusion of inhabitants and animals during the cure
Atmospheric renewal accelerates solidification while protecting respiratory wellness.
Bottom Line
Choosing the right grit sequence and sealer is the difference between a flawless finish and a frustrating do-over. Work from coarse → medium → fine, then apply the right sealer for your floor type, traffic, and look. Water-based polyurethanes offer convenience and clarity while oil-based formulas provide traditional durability and warmth.
Rustic Wood Floor Supply has equipped DIY enthusiasts and professional contractors with top-tier floor refinishing supplies for years. We understand that choosing from countless sandpaper grits and sealer options feels overwhelming. That’s why we provide personalized guidance, matching materials to your specific project requirements.
Contact us to Start Your Project: (678) 691-0533
Frequently Asked Questions
1. How do I choose the right sandpaper grit for floor refinishing?
Start with coarse grit (36-40) for removing old finishes, progress to medium (60-80) for smoothing, and finish with fine grit (100-120) before sealing. Starting grit depends on the floor condition.
2. Why is the grit sequence important when sanding floors?
Correct sequence minimizes scratches, produces smoother finishes, and ensures proper sealer adhesion. Each finer grit removes previous scratches. Skipping steps leaves visible marks showing through your finish.
3. What types of sealers are best for refinishing wood floors?
Water-based polyurethanes dry quickly with clear finishes. Oil-based formulas offer durability and warm tones. Penetrating sealers work best for moisture-prone areas like basements.
4. How do I know which sealer to use for my specific floor?
Choose based on floor material, desired finish (glossy vs. matte), traffic volume, and moisture exposure. Engineered floors need water-based options. High-traffic areas benefit from oil-based durability.
5. Should I sand between coats of sealer?
Yes, lightly sand with very fine grit (150-220) between coats. This screening process removes imperfections and improves layer bonding without cutting through previous applications.
6. What are common mistakes to avoid when refinishing floors?
Avoid skipping grit steps, inadequate dust cleaning between sandings, and rushing sealer application. These errors create rough finishes, poor adhesion, or uneven appearance and weaken floor structure.
Author Profile
- I have worked in hardwood flooring for the last 8 years. Use to run a company of residential crews as well as a company with gym flooring. If you need floor installation or refinishing help, I should have an answer or at least get you in the right direction.
Latest entries
 Hardwood FlooringFebruary 27, 2026Benefits of Engineered Wood Flooring
 Hardwood FlooringFebruary 26, 2026Guide on Average Length of Hardwood Flooring
 Hardwood FlooringFebruary 24, 2026Laminate vs Solid Hardwood Flooring: Comparison Guide
 Hardwood FlooringFebruary 20, 2026Engineered Vs. Hardwood Flooring – Comparison Guide


